This knowledge base article provides a detailed guide on how to create a Vendor account, ensuring a smooth onboarding process for vendors.
Sign Up as a Vendor:
-
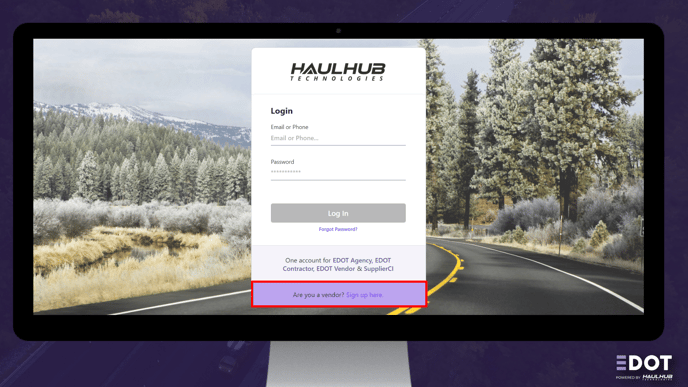
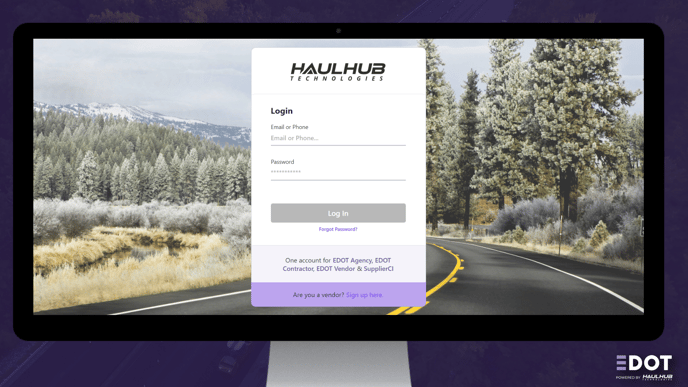
Start by navigating to the HaulHub EDOT Vendor platform's login page using a web browser. The login page is where you will initiate the account creation process.
-
Navigate to the signup page by following this link: https://app.e-dot.com/auth/login
-
-
On the login page, look for the option to "Sign Up as a Vendor." Click on this option to begin the account creation process specifically tailored for vendors.
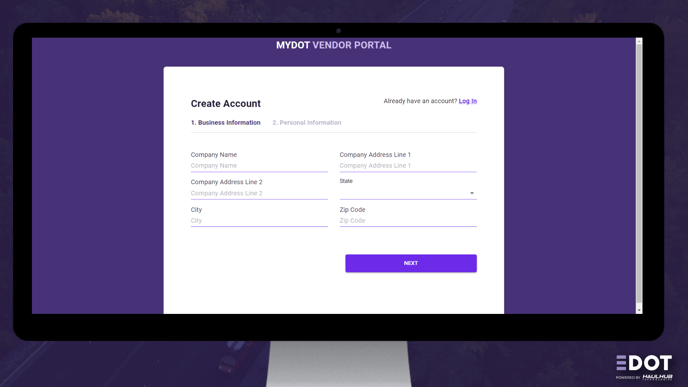
- Follow the prompts presented on the screen to provide the necessary information required to set up your Vendor account. This may include details such as your name, email address, company information, contact details, and any other relevant information.
Confirmation Email:
-
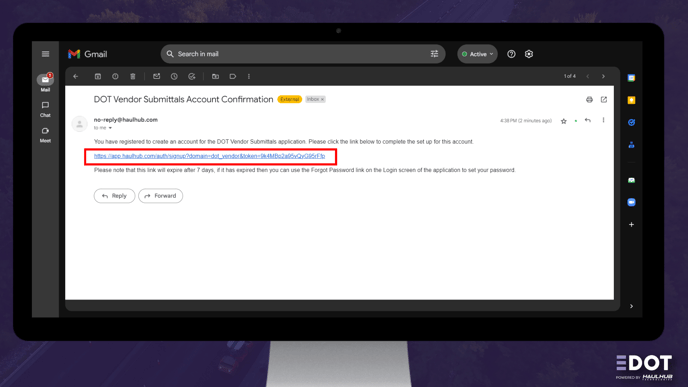
After filling in all the required fields, submit the information. Check your email inbox for a confirmation email from the HaulHub EDOT Vendor platform. This email contains a link to verify your email address and proceed with the account setup.
Creating a Secure Password:
-
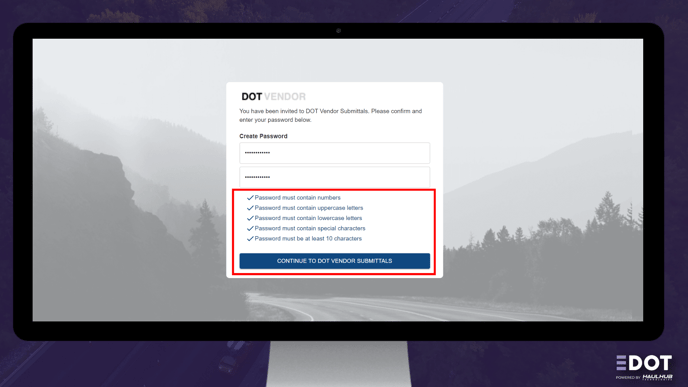
Click on the link provided in the confirmation email to access the account setup page. Here, create a secure password for your Vendor account. Ensure that your password meets the security requirements outlined by the platform, such as a minimum length, use of uppercase letters, numbers, and special characters.
Account Creation Confirmation:
-
Once you have successfully created your new Vendor account and set a secure password, you will receive a confirmation message indicating that your account setup is complete.
-
You are now ready to log in to your Vendor account and access the platform's features.
Conclusion:
Creating a Vendor account on the HaulHub EDOT Vendor platform is a straightforward process that empowers vendors to leverage the platform's features for effective project management and collaboration. By following the step-by-step guide provided in this article, vendors can create their accounts seamlessly and begin using the platform to enhance their project workflows.
Additional Resources:
- We've also included a video detailing the steps above: