-1.png?width=113&height=50&name=HaulHub%20EDOT%20Logo%20(color-trans%20bg)-1.png)
Last Updated: 03/08/2021
Overview:
Under Job Management click on Timesheets to select the Job to review shifts and Bulk Approve.
Your account must have the Bulk Approval feature enabled to follow along. Please reach out to Haulhub Customer Support for more information.
Walkthrough:
 Step 1
Login to HaulHub by selecting Login and selecting Contractors.
 Step 2
Enter your phone number and password to login.
Step 3
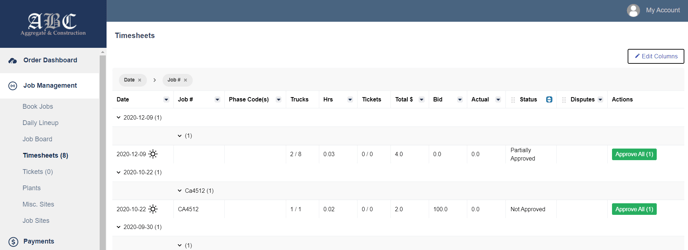
Under Job Management select Timesheets, the main view of bulk timesheets in the flex grid.
Step 4
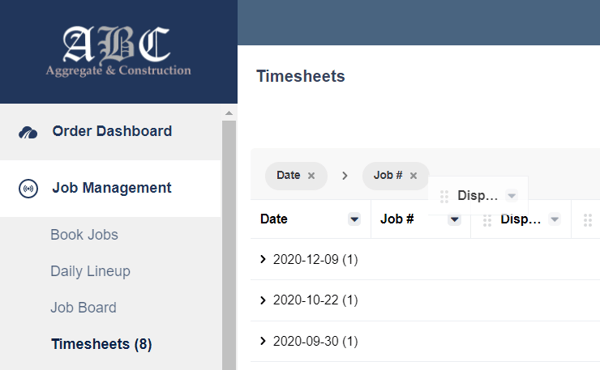
You can filter by dragging a column into the Flex Grid.
Tips:

-
- Currently only Status, Job #, Disputes, Onsite, Booked by, Jobsite and Department can be dragged into the flex grid.
- Edit the columns that are viewed in the flex grid by selecting Edit Columns on the top right hand corner.
- Check or uncheck columns to your preference
Step 5
Click on the date to view jobs for that day.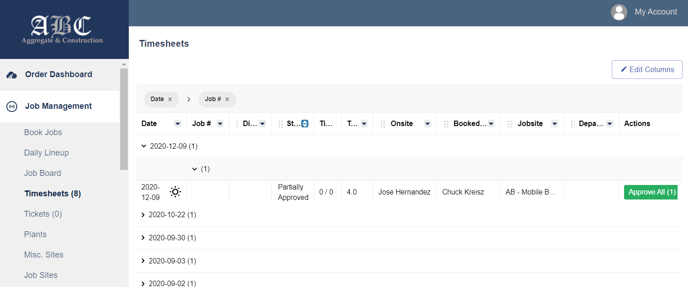
-
- By default the system sorts by date
- View a high level overview of the job with the columns selected
- Select Approve All in this view if the high level overview meets the expectations of the job.
Step 6
Click the job line to view more specific details of the job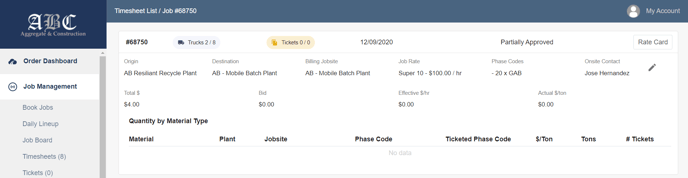
-
- At the top of the screen will be the job details
- Click the pencil on the right hand side to change:
- Rate
- Billing Jobsite
- Phase Code
- Onsite Contact
Below the job details is a list of the shifts for this job
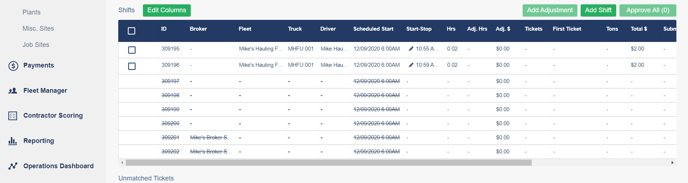
Tips:
- Just like the flex grid all of the columns are editable by selecting the green Edit columns button on the left
- Edit Start/ Stop times by selecting the pencil icon
- View tickets for individual shifts by selecting the blue “Tickets” button
-
- If a shift did not get assigned through HaulHub but still ran the job that day. Select Add Shift.
- Fill in Fleet, Truck, Driver, Start and End Time.
- Now a timesheet will be created for that shift
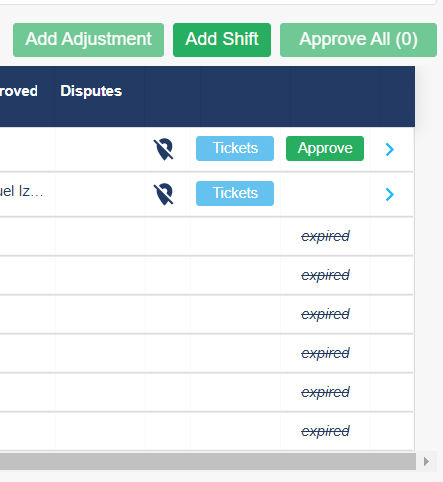
- If there is a line through a shift, that means a truck didn’t start his shift for that day.
- If the truck ran that day and you want to create a timesheet there is a “+” button on the right side of that shift line.
- Select it to add a start/ end time for that shift and create a timesheet
- Add adjustments to shift/s by selecting the box/s on the left side of the shift or to add adjustments to all shifts, select the blue box in the menu bar to highlight all shifts at once.
- Then select the green Add Adjustment box.
- Fill out required fields and Add Bulk Adjustments
- If a shift did not get assigned through HaulHub but still ran the job that day. Select Add Shift.
 Step 8
Approve a single shift by selecting the green Approve button on the right side
-
- May not be visible on a smaller screen, must scroll to the right to view.
- Bulk approve timesheets by selecting the Select All blue box or select individual shifts.
- Once wanted shifts are chosen, select the green Approve All button
Click the blue arrow on the right side of the shift to drill down into the shift and view in much greater detail:
-
- Map of the haulers route throughout their shift
- GPS route log (time spent in the starting location, driving and destination)
- Adjust start and end time
- Adjust billing jobsite
- Add phase codes if not already populated
- Adjust hourly rate
- View tickets
- Add adjustments (day minimum, travel, standby, etc.)
- View/ Add pertinent internal notes
See How do I approve a timesheet? For more details
Still Need Help?
If you have any more questions feel free to reach out to our support team.
- Email: support@haulhub.com